
Hellooo my fellow crafty friend! 🍂 Thank you for stopping by the Minny Blog, and welcome!
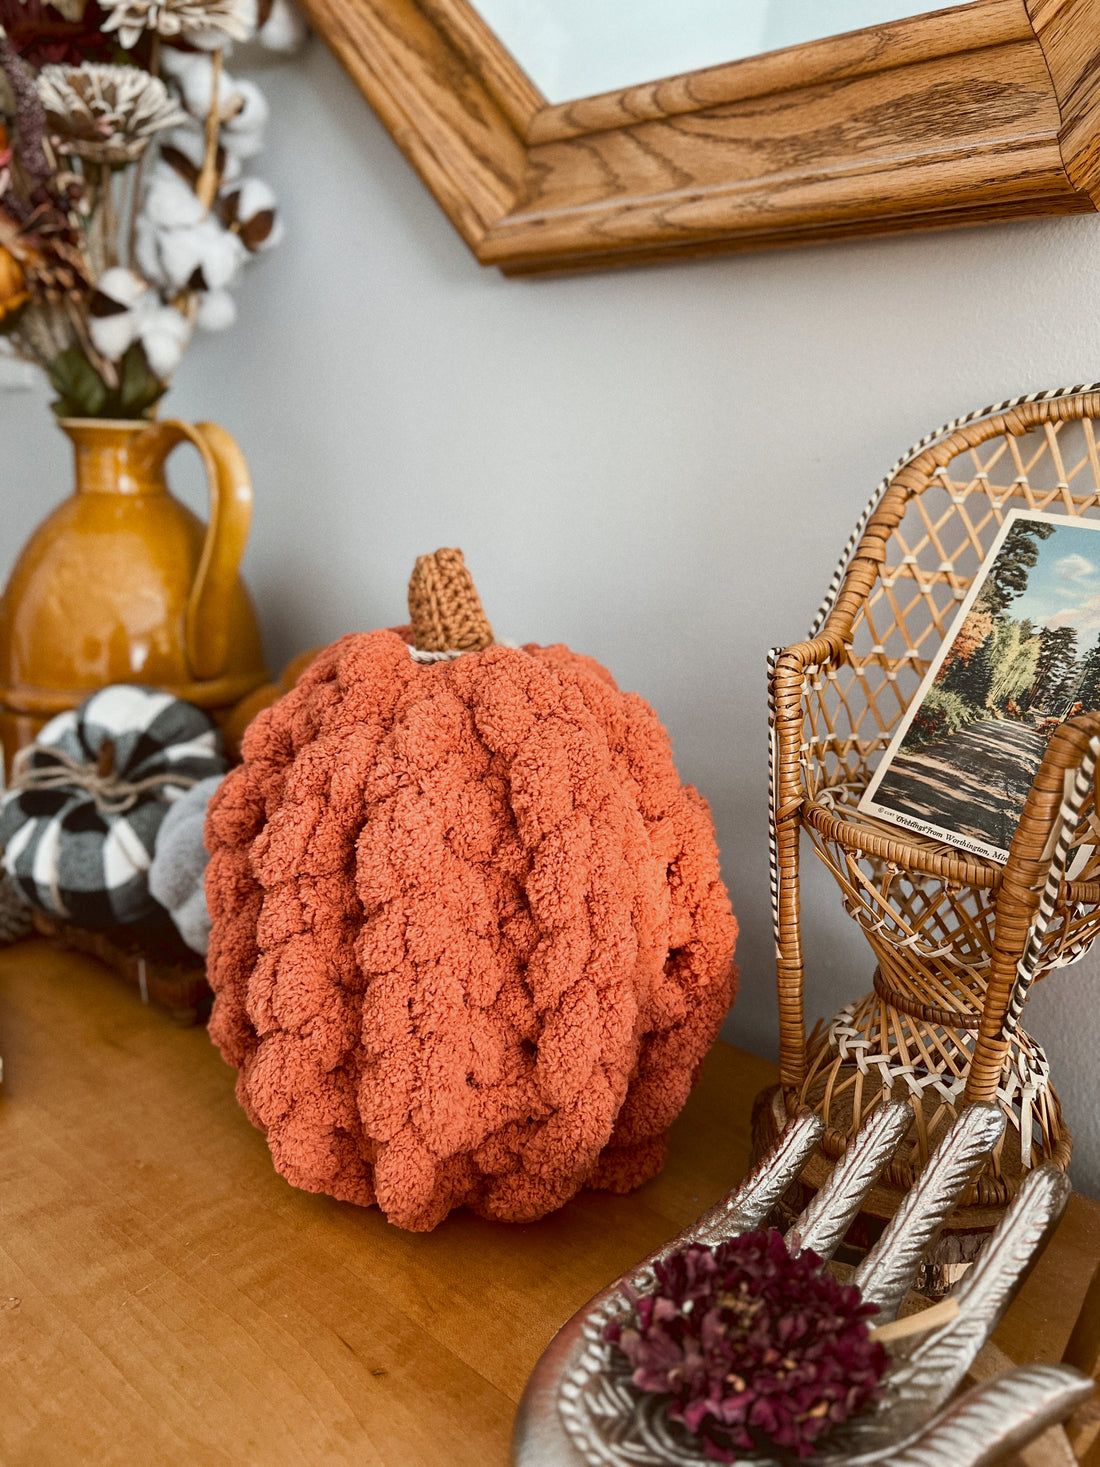
Today, I'm sharing the pattern for my super fun XL Finger Crochet Pumpkin! This baby makes a statement at ~10.5" tall and adds some texture & a fun creative vibe to your cozy home. 🎃
If you're anything like me, you can't wait for fall and when it's finally time to transform your home into the coziest space, filled with all things pumpkin-spiced and warm-toned. I actually found this yarn at goodwill, so figured it was time to add a crocheted pumpkin to my home (believe it or not, this is the first pumpkin I've ever crocheted!).
I wanted it to be a pretty quick and easy project, and this takes about 30-45 minutes. This pattern is finger crocheted, but if you had a large enough crochet hook, that would work too. Recommended crochet hook on the yarn used here is 25mm.
I kept my tension pretty tight so I could use only 1 skein of yarn for this!
Sharing & Creating:
This pattern is an original Made in Minny Design & for personal use. Please do not sell any products you have made using this pattern. You may not copy, sell, or distribute this pattern in any way, or use these photos and claim them as your own. If you make this pumpkin for yourself or as a gift, I'd love if you tagged me when you share on socials @made_in_minny or the hashtag #XLcrochetpumpkin or #madeinminny!
Skill level:
Easy, but must have some basic crochet knowledge :)
Stitches / abbreviations used in this pattern:
- Chain / ch(s)
- Single crochet / sc(s)
- Double crochet / dc(s)
- Magic circle
- Slip stitch(es) / sl st(s)
- Back loop only / BLO
- Stitches will be abbreviated as sts

Yarn used for the body of the pumpkin:
Yarn Bee Eternal Bliss (color here is Spiced Persimmon). Comparable is Bernat Blanket Extra yarn. This is a very bulky blanket type yarn with a sherpa feel.
This project requires 1 skein of this yarn (8oz/28yds)
Yarn weight: 7 (jumbo)
Yarn used for the stem of the pumpkin:
Small amount of I Love This Cotton! yarn in the colors Parchment & Antique Gold. You can use any colors for the stem, and it definitely doesn't have to be two different colors. That's just what my mind came up with, but feel free to use your own creativity or whatever you have on hand!
Notions:
- Size 4mm crochet hook (for the stem)
- Scissors
Measurement:
The finished pumpkin is roughly 10.5" tall & 8" wide at the widest part (center measuring across).
Pattern:
*Note* I kept my tension pretty tight so I could use only 1 skein of yarn for this!
THE PUMPKIN
Begin by making a chain of 8.
Row 1: Sl st 7, ch 1 & turn
Row 2: Sl st 7 in BLO, ch 1 & turn
Row 3: Sl st 7 in BLO, ch 1 & turn
Row 4-end of skein (19 or 20 rows depending on your tension): Repeat row 3 until the end, leaving about 2 feet of yarn to work with so you can close your pumpkin.
Closing the pumpkin (see photo below for more visuals): Connect the short sides of your rectangle by slip stitching together, aligning your last row of stitches to your beginning chains. Fasten off & leave a short tail of yarn for the stem.
Use some spare yarn to cinch the top of the pumpkin (I didn't use the blanket yarn because it's too bulky, so I used the I Love This Cotton! yarn to cinch up the top with a simple basting stitch, weaving in and out of the top. Any yarn will work).
*Note* Don't close the top tightly so you are able to pull a little loop of the blanket yarn tail through the center after you turn it right side out. This will serve as a little insert/structure for the stem.
Turn your work right side out & pull up a small loop of the blanket yarn through the top of the center. This is what gives us some structure for the little pumpkin stem.
I did not close the bottom of my pumpkin. I like the structure of it and thought it sat nicely without closing the bottom. You can totally play around with it and close the bottom if you'd like!

THE BASE OF THE STEM
Begin by making a magic circle using your 4mm crochet hook & I Love This Cotton! in the lighter color, or the color of your choice. This is for the base of the stem.
DC 36 into the magic circle & fasten off, weave in ends (or don't if you are lazy like me, LOL. It definitely can be hidden.)
Place this little ring over the loop of blanket yarn that you pulled up to form the stem.
THE STEM
Using your 4mm crochet hook and the antique gold I Love This Cotton! yarn.
Begin by chaining 10.
Row 1: SC 9, ch 1 & turn
Row 2: SC 9 in BLO, ch 1 & turn
Rows 3-11: Repeat row 2 for rows 3-11
Join the short ends of your rectangle by connecting your working yarn to the beginning chains, slip stitching to connect the sides & cinch up the top of the rectangle & fasten off, leaving a short tail. Turn right side out & place over the loop of blanket yarn you previously pulled up through the top of the pumpkin. To better secure the stem, I did pull the tail through the top of my pumpkin and knot it on the inside to attach it.
VISUAL OF THE PROCESS: You can also watch my video here.

Make your own size:
The best part about this design is that you could freestyle it based on the size/height of pumpkin you desire. If you want a smaller size, start with a shorter chain at the beginning to make the height shorter. If you want it to be larger, you could make a longer chain to start. The key with making it larger would be keeping your tension tight so it comes out more rigid and can stand upright easily.
Share & save!
This pattern is an original Made in Minny Crochet Pattern Design & for personal use. Please do not sell any products you have made using this pattern. You may not copy, sell, or distribute this pattern in any way, or use these photos and claim them as your own. I'd love if you tagged me when you share on socials @made_in_minny or the hashtag #XLcrochetpumpkin or #madeinminny!
Leave a comment below if you plan to make this! Can't wait to see your pumpkin creations & happy fall!🍂
Xo, Naomi